


Introduction
NEAR protocol is a layer 1 sharded proof of stake blockchain focused on scalability. It is both user and developer-friendly, smart contracts can be built on NEAR with either AssemblyScript or Rust.
Learn more about the NEAR Protocol.
In this article, we'll build and deploy a decentralized blog dapp where users can read blog posts, connect their NEAR wallet, publish blog posts and also appreciate other authors by sending NEAR tokens.
The smart contract will be built using AssemblyScript and near-sdk-as library. This library is a collection of tools for building NEAR smart contracts written in AssemblyScript.
Prerequisites
Have a NEAR Testnet account, visit NEAR wallet to create one.
Javascript/Typescript knowledge.
Familiarity with React.
Ensure that Node.js version >=
12.x.xand npm are installed on your system.
Project Setup and Installation
To start building NEAR smart contracts seamlessly, you need to have some important tools installed globally. Run each of these commands:
npm install -g near-cli
npm install -g assemblyscript
npm install -g asbuild
Login to NEAR
For this next step, you need to have a NEAR Testnet account.
To login to your Testnet account, run the code below in your terminal:
near login
This will lead you to your browser to authorize.
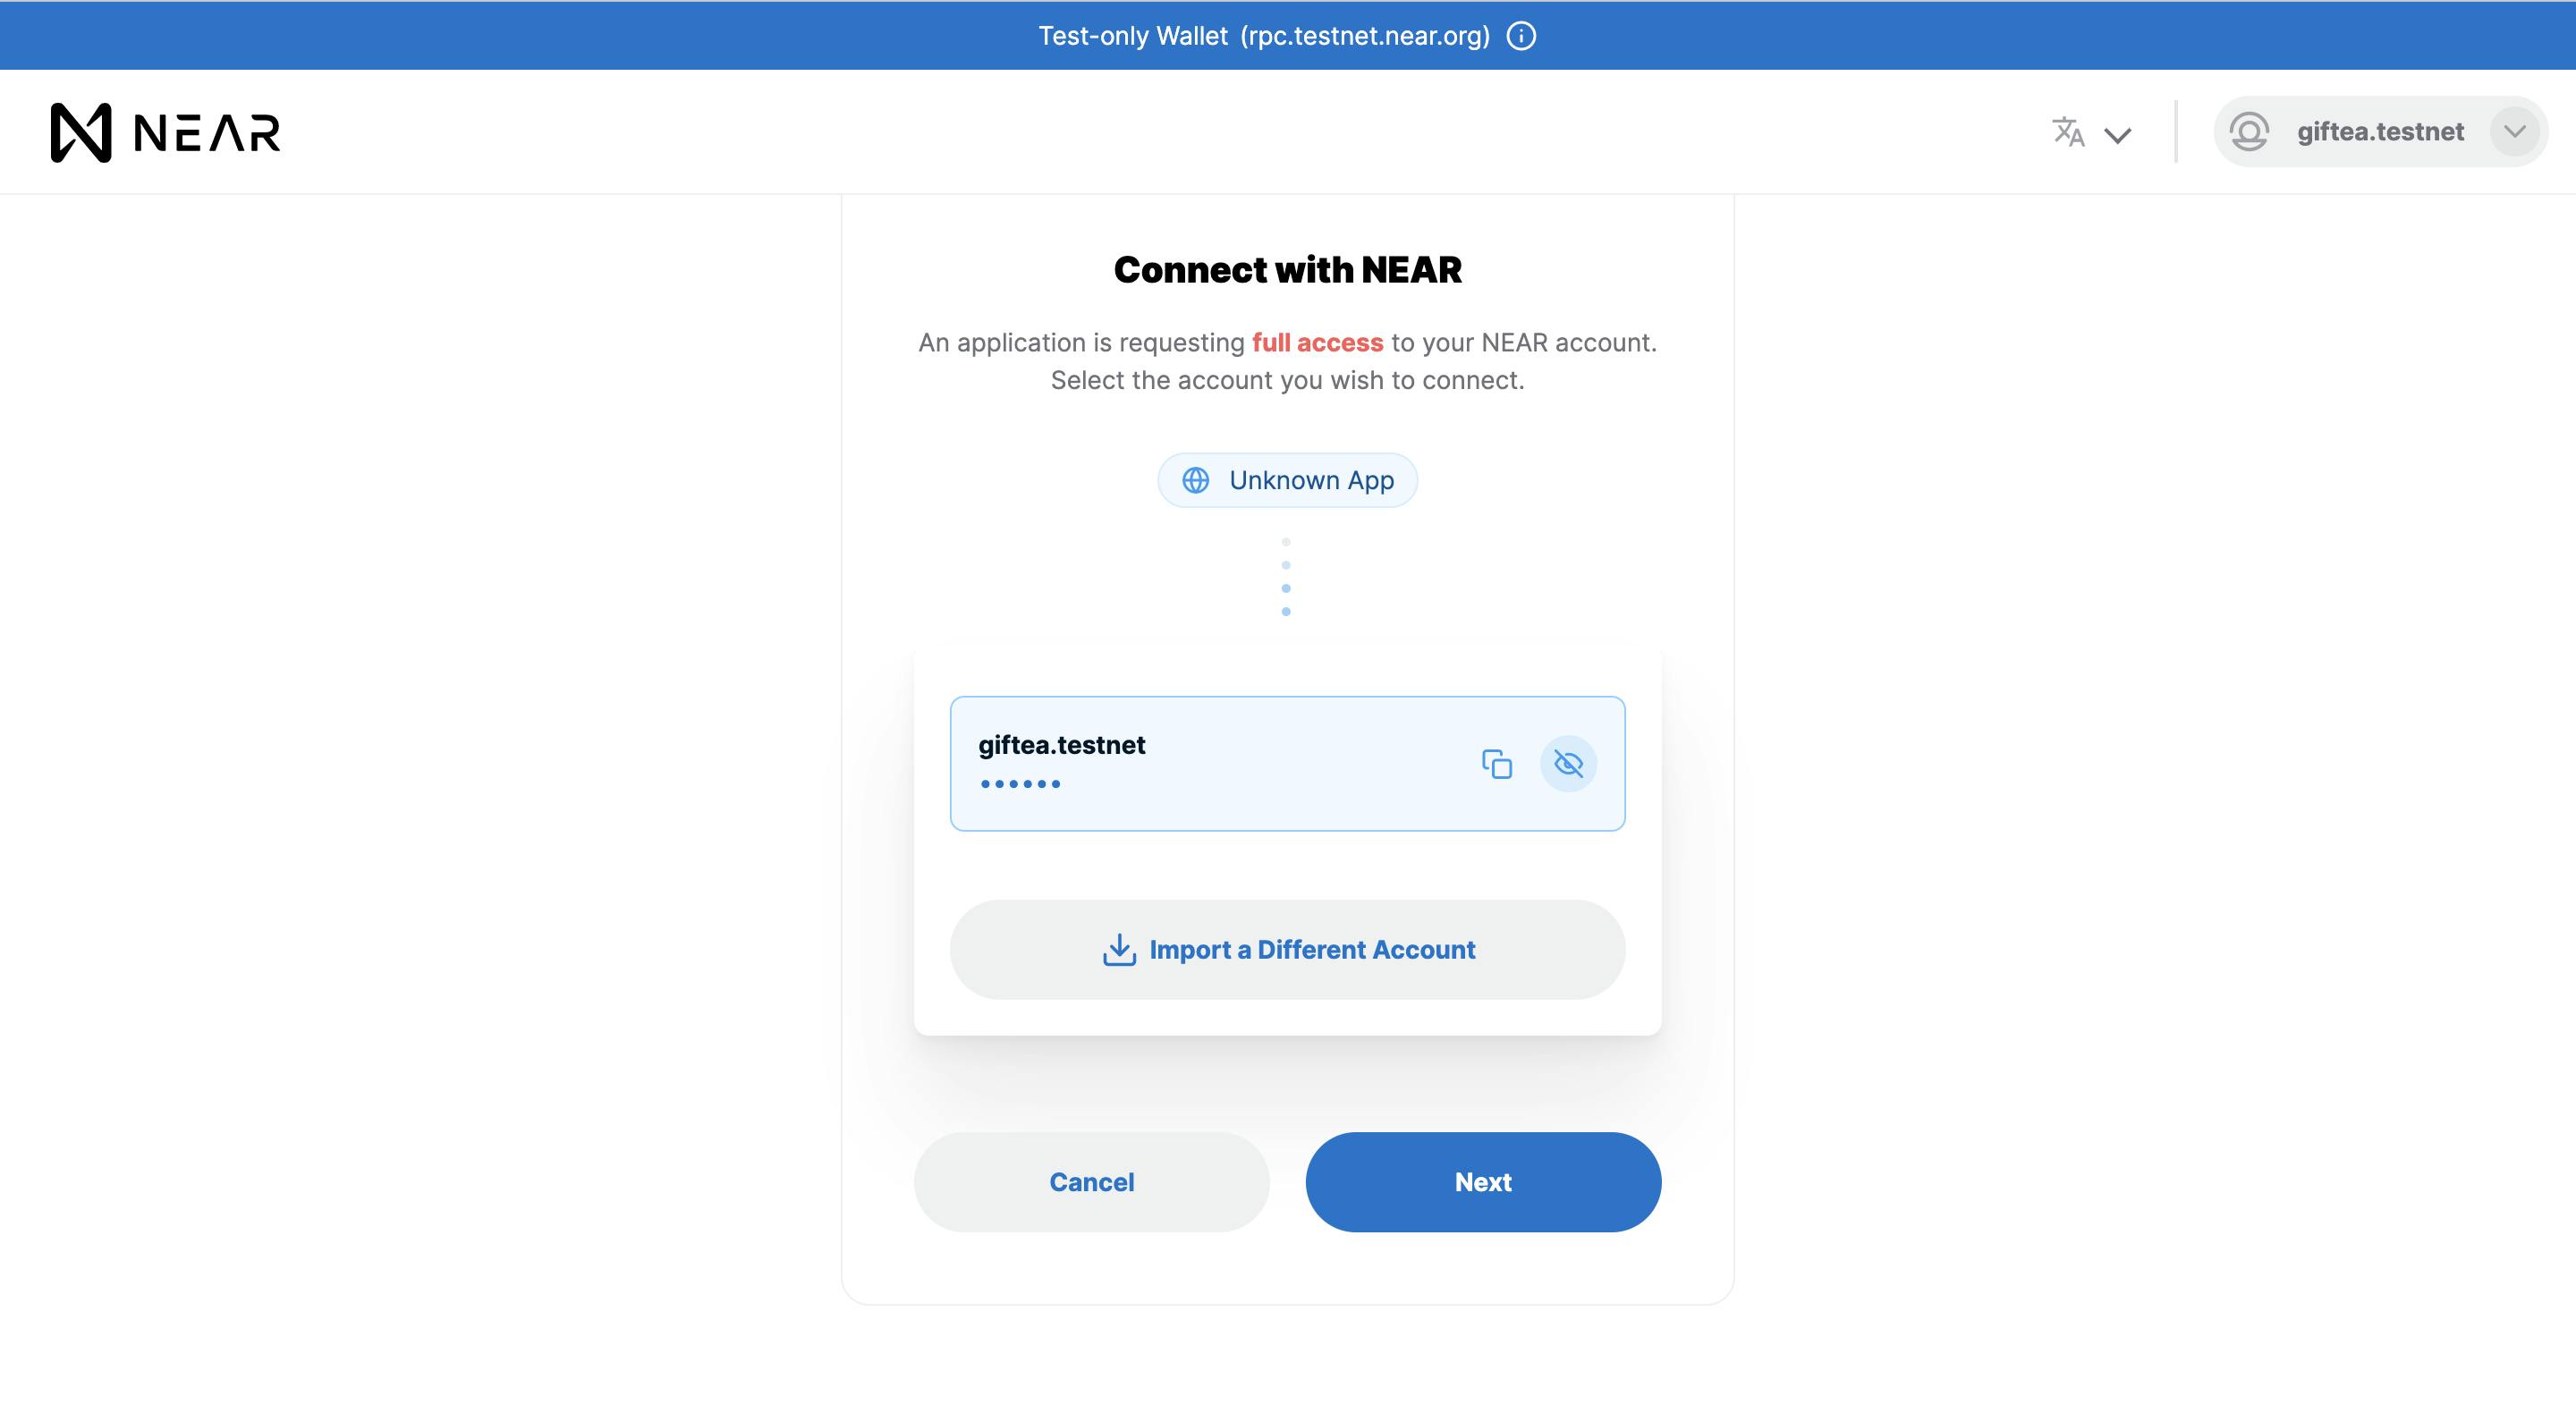
Click on the 'Next' button then click on 'Connect'.
Subaccount Creation
With NEAR, you have the flexibility to create subaccounts under your main account. Let's create subaccounts for our smart contract.
Here's the syntax for creating subaccounts:
near create-account ${SUBACCOUNT_ID}.${ACCOUNT_ID} --masterAccount ${ACCOUNT_ID} --initialBalance ${INITIAL_BALANCE}
SUBACCOUNT_ID: This is the identifier for the sub-account.
ACCOUNT_ID: Refers to your main account identifier.
INITIAL_BALANCE: the initial balance allocated to the sub-account in NEAR tokens.
For instance, we'll create three subaccounts:
mycontract.<YOUR_ACCOUNT>.testnetmytestaccount.<YOUR_ACCOUNT>.testnetmytestaccount2.<YOUR_ACCOUNT>.testnet.
One of these accounts will host our deployed contract, while the other two will be used for testing purposes.
Here's an example command:
near create-account mycontract.giftea1.testnet --masterAccount giftea1.testnet --initialBalance 3
Should result to this:

Use this syntax and create two more subaccounts on your main account: mytestaccount.<YOUR_ACCOUNT>.testnet and mytestaccount2.<YOUR_ACCOUNT>.testnet.
You should have three subaccounts now:
mycontract.<YOUR_ACCOUNT>.testnetmytestaccount.<YOUR_ACCOUNT>.testnetmytestaccount2.<YOUR_ACCOUNT>.testnet
Smart Contract
In this section, the smart contract will be built with AssemblyScript and near-sdk-as.
Have no prior experience with AssemblyScript?
Don't fret, AssemblyScript is very similar to TypeScript, so getting started with AssemblyScript is not much of a hassle.
Project Setup
Create a new root directory for the project, you can call it
near-blog-contract.In the root directory create a new file
asconfig.json. Add the code block below in the file:{ "extends": "near-sdk-as/asconfig.json" }Create an
assemblydirectory, and add atsconfig.jsonfile in it. Add the code block below in theassembly/tsconfig.jsonfile:{ "extends": "../node_modules/assemblyscript/std/assembly.json", "include": [ "./**/*.ts" ] }Create a new file
assembly/as_types.d.tsin theassemblydirectory. Add the code below:/// <reference types="near-sdk-as/assembly/as_types" />Run the following commands to initialize the project in the project root directory and install dependencies:
  npm init
  npm install -D near-sdk-as
Create an entry file
index.tsin theassemblydirectory.
Your near-blog-contract structure should look like this:
├── asconfig.json
├── assembly
│   ├── as_types.d.ts
│   ├── index.ts
│   └── tsconfig.json
├── package.json
└── yarn.lock
Creating the Blog Model
Create a new file model.ts under assembly/ directory.
The model of a single blog post will be defined in this file, a model is an AssemblyScript class that defines a new type, in our case the Blog type.
Paste the code below in assembly/model.ts to create the Blog model:
import { u128, context, PersistentUnorderedMap } from "near-sdk-as";

// @nearBindgen is used to serialize the `Blog` class before storing it on the blockchain.
@nearBindgen
export class Blog {
  // Define the `Blog` fields and data types
  id: string;
  title: string;
  content: string;
  author: string;
  createdAt: u64;
  appreciationCost: u128; // readers will be able to appreciate an author by sending NEAR tokens
  appreciationCount: i32; // the number of readers that appreciated a blog post

  // Define methods for the `Blog`
  // 1) `createBlog` method takes in a payload and returns a new `Blog` object
  public static createBlog(payload: Blog): Blog {
    const blog = new Blog();
    blog.id = payload.id;
    blog.title = payload.title;
    blog.content = payload.content;
    blog.appreciationCost = payload.appreciationCost;
    blog.author = context.sender;
    blog.createdAt = context.blockTimestamp;

    return blog;
  }

  // 2) `incrementAppreciationCount` method increases the `appreciationCount` of a blog
  public incrementAppreciationCount(): void {
    this.appreciationCount = this.appreciationCount + 1;
}
}

export const blogPosts = new PersistentUnorderedMap<string, Blog>("BLOG_POSTS");
We have 3 imports from near-sdk-as.
u128: The 128 bit unsigned integer makes it possible to store theappreciationCostin Yocto, which is the smallest unit of NEAR.context: This is an object containing information about the transaction.PersistentUnorderedMap: This allows us to create a new persistent unordered mapblogPosts(a collection of all blog posts).
Writing the Smart Contract
Navigate to assembly/index.ts, this is where the smart contract will be written.
Our contract will store and fetch data from the blockchain.
Replace the entire code in assembly/index.ts with:
import { Blog, blogPosts } from "./model";
import { context, ContractPromiseBatch } from "near-sdk-as";

export function setBlog(blog: Blog): string {
  let storedBlog = blogPosts.get(blog.id);
  // check if blog with same id already exist
  if (storedBlog !== null) {
    throw new Error(`A blog post with ${blog.id} already exists`);
  }
  blogPosts.set(blog.id, Blog.createBlog(blog)); // create a new blog using `createBlog` method
  return "Blog Post Created!";
}
This function creates a new blog.
The next functions will retrieve a single blog post and all blog posts respectively.
Add the new functions below to assembly/index.ts:
export function getBlog(id: string): Blog | null {
  // assert that blog with given id exists
  assert(blogPosts.contains(id), "This Blog doesn't exist");
  return blogPosts.get(id);
}

export function getBlogs(): Blog[] {
  return blogPosts.values();
}
In getBlog function, the assert method from AssemblyScript is used to verify that a blog with the given id exists. If it exists, the blog is returned.
getBlogs() returns an array of all blog posts.
Now let's create a function that enables a user to appreciate an author. Add the code block below to assembly/index.ts:
export function appreciateBlog(blogId: string): void {
  const blog = getBlog(blogId); // retrieve blog
  if (blog == null) {
    throw new Error("Blog post not found"); // check if blog exists
  }
  // assert that the reader sends the correct appreciation cost
  assert(blog.appreciationCost.toString() == context.attachedDeposit.toString(), "Attached deposit should equal to the appreciation cost");

  ContractPromiseBatch.create(blog.author).transfer(context.attachedDeposit); // send `appreciationCost` to blog author
  blog.incrementAppreciationCount(); // increment `appreciationCount`
  blogPosts.set(blog.id, blog); // update blog
}
ContractPromiseBatch is used to initialize the transfer of NEAR tokens from one wallet to another within an AssemblyScript contract.
It takes in the receiver in its .create() and the amount in .transfer().
That's it! We're done with writing the smart contract 🚀
Compile and Deploy Contract
Let's deploy to NEAR Testnet.
First compile the smart contract to WASM, run the command below:
yarn asb
The compiled WASM code will be store in build/release/${FILE_NAME}.wasm .
We'd deploy the smart contract to one of the subaccounts we created earlier mycontract.<YOUR_ACCOUNT>.testnet .
To deploy our smart contract to the NEAR testnet, we need to run the following command:
near deploy ${CONTRACT_ADDRESS_ID} ${PATH_TO_WASM}
${CONTRACT_ADDRESS_ID}- the account that will deploy the smart contract tomycontract.<YOUR_ACCOUNT>.testnet.${PATH_TO_WASM}- the path to the.wasmfile that contains the compiled smart contract.
For example:
near deploy mycontract.giftea1.testnet build/release/y.wasm
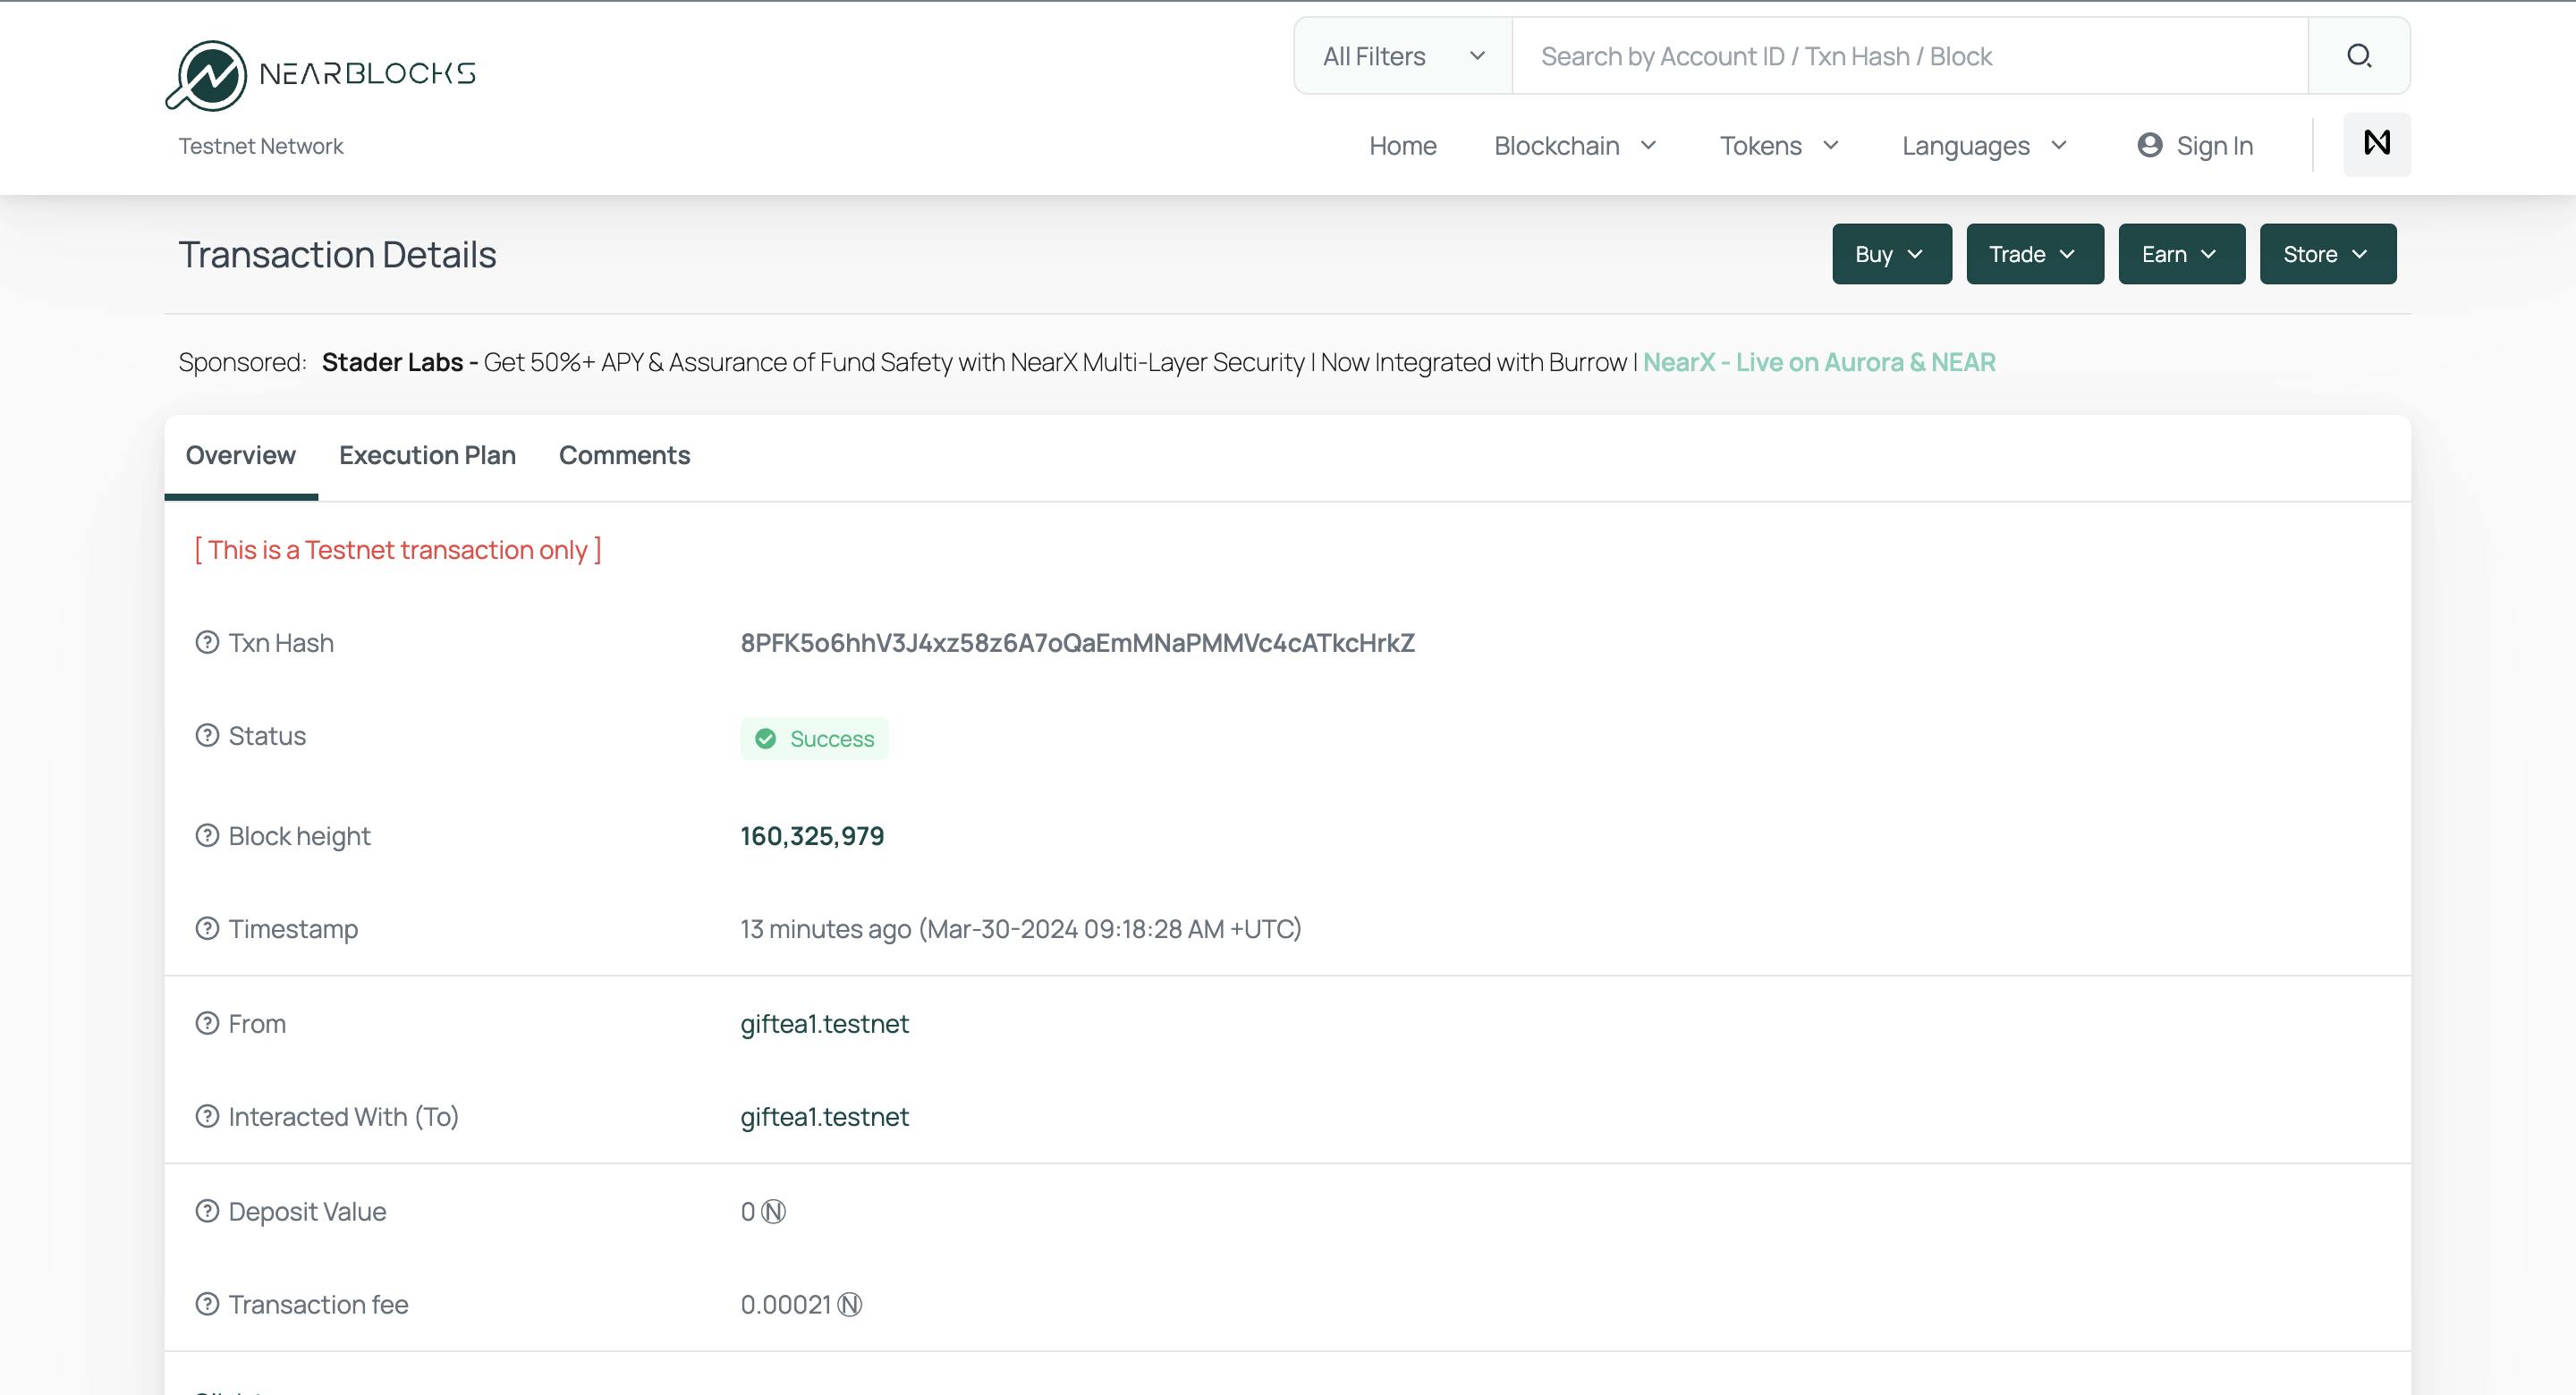
It should result this:

Your transaction ID is returned and you can view your transaction at "https://testnet.nearblocks.io/txns/${YOUR_TRANSACTION_ID}".
Contract Calls
In this section, we will call our smart contract's functions.
The two kinds of function calls are view and change.
viewcalls read data from the blockchain.changecalls write to the blockchain and change its state.
In our smart contract, setBlog and appreciateBlog are change calls because they write data to the blockchain and update it.
While getBlog and getBlogs are view calls because they only read data from the blockchain.
Change Contract Calls
When you want to make change contract calls, you use the syntax below:
near call <CONTRACT-ADDRESS> <METHOD-NAME> <PAYLOAD> --accountId=<ADDRESS>
<CONTRACT-ADDRESS>: The address your contract was deployed to. In my case, I deployed to "giftea1.testnet".<METHOD-NAME>: The name of the function you're calling.<PAYLOAD>: The payload of the function.<ADDRESS>: The NEAR account making the call.
setBlog()
To call the setBlog function on the smart contract, run the command below:
Replace <CONTRACT-ADDRESS> with your contract's address.
Replace <YOUR-TEST-ADDRESS> with one of your subaccount - mytestaccount.<ACCOUNT>.testnet
near call <CONTRACT-ADDRESS> setBlog '{"blog": {"id": "00-Blog", "title": "First Blog Post", "content": "Article body", "appreciationCost": "1000000000000000000000000" }}' --accountId=<YOUR-TEST-ADDRESS>
You should see an output similar to this if successful.

appreciateBlog()
To call the appreciateBlog, we will use the mytestaccount2.<YOUR_ACCOUNT>.testnet sub account to appreciate the blog created by mytestaccount.<YOUR_ACCOUNT>.testnet.
To appreciate the author of the newly created blog, run the command below:
near call <ADD_YOUR_CONTRACT_ADDRESS_HERE> appreciateBlog '{"blogId": "00-Blog"}' --depositYocto=1000000000000000000000000 --accountId=<ADD_YOUR_SUB_ACCOUNT>
Example:
near call mycontract.giftea1.testnet appreciateBlog '{"blogId": "00-Blog"}' --depositYocto=1000000000000000000000000 --accountId=mytestaccount2.giftea1.testnet
You should see an output similar to this if successful.

View Contract Calls
When you want to make view contract calls, you use the syntax below:
near view <CONTRACT-ADDRESS> <METHOD-NAME> <PAYLOAD>
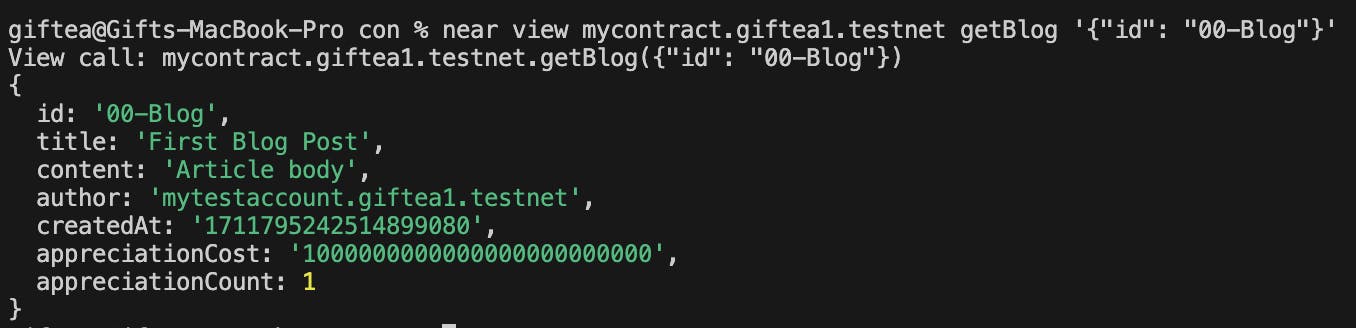
Let's call the getBlog function:
near view <ADD_YOUR_CONTRACT_ADDRESS_HERE> getBlog '{"id": "00-Blog"}'
You should see an output similar to this if successful.
We are done with the smart contract for our project.
Awesome!
Frontend Project Set-Up
Clone the starter branch of the project:
git clone --branch frontend-starter https://github.com/Giftea/NEAR-blog.gitIn your terminal, navigate to the
frontend/directory and run the commands below:npm install npm startCreate a
.envfile in the root of thefrontend/directory and add the address you deployed your smart contract to.Example:
CONTRACT_NAME = "mycontract.testnet"Create a new file
near-config.jsin the root of thefrontend/folder. Add the code below:const CONTRACT_NAME = process.env.CONTRACT_NAME || "${CONTRACT_NAME}"; // Your Contract address; dev-xxxxxxxxxxxx-xxxx function getConfig(env) { switch (env) { case "mainnet": return { networkId: "mainnet", nodeUrl: "https://rpc.mainnet.near.org", contractName: CONTRACT_NAME, walletUrl: "https://www.mynearwallet.com", helperUrl: "https://helper.mainnet.near.org", explorerUrl: "https://explorer.mainnet.near.org", }; case "testnet": return { networkId: "testnet", nodeUrl: "https://rpc.testnet.near.org", contractName: CONTRACT_NAME, walletUrl: "https://testnet.mynearwallet.com", helperUrl: "https://helper.testnet.near.org", explorerUrl: "https://explorer.testnet.near.org", }; default: throw Error(`Unknown environment '${env}'.`); } } export default getConfig;Create a new file
near-api.jsin thefrontendfolder and add the code below:import { connect, Contract, keyStores, WalletConnection } from 'near-api-js'; import getConfig from "./near-config"; const nearConfig = getConfig("testnet"); // Initialize contract & set global variables export async function initContract() { // Initialize connection to the NEAR testnet const near = await connect( Object.assign( { keyStore: new keyStores.BrowserLocalStorageKeyStore() }, nearConfig ) ); // Initializing Wallet based Account. It can work with NEAR testnet wallet that // is hosted at https://wallet.testnet.near.org window.walletConnection = new WalletConnection(near); // Getting the Account ID. If still unauthorized, it's just empty string window.accountId = window.walletConnection.getAccountId(); // Initializing our contract APIs by contract name and configuration window.contract = await new Contract(window.walletConnection.account(), nearConfig.contractName, { // View methods are read only. They don't modify the state, but usually return some value. viewMethods: ["getBlog", "getBlogs"], // Change methods can modify the state. But you don't receive the returned value when called. changeMethods: ["setBlog", "appreciateBlog"], }); } export function signOutNearWallet() { window.walletConnection.signOut(); // reload page window.location.reload(); } export function signInWithNearWallet() { // Allow the current app to make calls to the specified contract on the // user's behalf. // This works by creating a new access key for the user's account and storing // the private key in localStorage. return window.walletConnection.requestSignIn({ contractId: nearConfig.contractName, }); }Update the
index.jsfile with the code below:import React from 'react'; import { createRoot } from 'react-dom/client'; import App from './App'; import { initContract } from './near-api'; const reactRoot = createRoot(document.querySelector('#root')); window.nearInitPromise = initContract() .then(() => { reactRoot.render(<App />); }) .catch(e => { reactRoot.render(<div style={{color: 'red'}}>Error: <code>{e.message}</code></div>); console.error(e); });
Initialize Contract Calls
We don't need an ABI for NEAR development as we do for Ethereum contracts. Instead, we create functions that interact with the NEAR wallet and smart contract.
The functions located in near-api.js are functions to interact with the NEAR wallet.
Now let's create functions that will interact with the blockchain.
Create a new file near-blog-api.js in the frontend folder and paste the code below:
import { v4 as uuid4 } from "uuid";
import { parseNearAmount } from "near-api-js/lib/utils/format";

const GAS = 100000000000000; // gas fee

export async function createBlog(blog) {
  blog.id = uuid4(); // creates unique id
  blog.appreciationCost = parseNearAmount(blog.appreciationCost + ''); // parseNearAmount converts price to correct format
  return window.contract.setBlog({ blog }, GAS, parseNearAmount(0.52 + ""));
}

export function getBlogs() {
  return window.contract.getBlogs();
}

export function getBlog(id) {
  return window.contract.getBlog(id);
}

export async function appreciateBlog(id, appreciationCost) {
  return window.contract.appreciateBlog({ blogId: id }, GAS, appreciationCost);
}
With window.contract, we have access to all view and change methods we specified in near-api.js.
Building Components
Create a new folder components within the frontend directory.
Nav Component
Create a new file components/Nav.jsx, and paste the code below:
import React from "react";
import { Flex, Spacer, Box, Button } from "@chakra-ui/react";
import { signInWithNearWallet, signOutNearWallet } from "../near-api";
import { Link, useNavigate } from "react-router-dom";

const Nav = ({ accountId }) => {
  let navigate = useNavigate();
  return (
    <Flex bg="blue.800" alignItems="center">
      <Box p="4" color="gray.50">
        <Link to="/">NEAR Blog</Link>
      </Box>
      <Spacer />
      <Box p="4">
        <Button onClick={() => navigate("/add")}>Add Post</Button>
      </Box>
      <Box p="4">
        {accountId ? (
          <Button style={{ float: "right" }} variant="link" onClick={signOutNearWallet}>
            Sign out {accountId}
          </Button>
        ) : (
          <Button style={{ float: "right" }}  colorScheme='teal' onClick={signInWithNearWallet}>
            Connect
          </Button>
        )}
      </Box>
    </Flex>
  );
};

export default Nav;
Layout Component
Create a new file components/Layout.jsx, and add the code below:
import { ChakraProvider, Container } from "@chakra-ui/react";
import Nav from "./Nav";

export const Layout = ({ children }) => {
    return (
      <ChakraProvider>
        <Nav accountId={window.accountId} />
        <Container>{children}</Container>
      </ChakraProvider>
    );
  };
Blog Card Component
Create a new file components/BlogCard.jsx, and add the code:
import { Box, Image } from "@chakra-ui/react";
import { Link } from "react-router-dom";

function Card({ blog }) {
  const img = "https://i.imgur.com/Jo1AKdb.png";

  return (
    <Link to={`/blog/${blog?.id}`}>
      <Box maxW="sm" borderWidth="1px" borderRadius="lg" overflow="hidden">
        <Image src={img} alt="Blog Image" />
        <Box p="6" bg="white">
          <Box mt="1" fontWeight="semibold" as="h4" lineHeight="tight" noOfLines={1}>
            {blog?.title}
          </Box>
          <Box mt="1" fontWeight="light" as="p" lineHeight="tight" noOfLines={2}>
            {blog?.content}
          </Box>
          <Box color="gray.500" fontWeight="semibold" letterSpacing="wide" fontSize="xs" textTransform="uppercase" mt={3}>
            {blog?.appreciationCount} Appreciations
          </Box>
        </Box>
      </Box>
    </Link>
  );
}

export default Card;
Blog cards of all blog posts will be displayed on the home page.
Building Pages
Create a new folder pages within the frontend directory.
Home Page
Create a new a new file pages/Home.js and paste the code below:
import React, { useEffect, useState } from "react";
import { Box, Divider, SimpleGrid } from "@chakra-ui/react";
import Card from "../components/BlogCard";
import { getBlogs } from "../near-blog-api";
import { Layout } from "../components/Layout";

const Home = () => {
  const [blogs, setBlogs] = useState([]);
  const [loading, setLoading] = useState(false);

  const fetchBlogs = async () => {
    try {
      setLoading(true);
      setBlogs(await getBlogs());
      setLoading(false);
    } catch (error) {
      console.log({ error });
    } finally {
      setLoading(false);
    }
  };

  useEffect(() => {
    fetchBlogs();
  }, []);

  return (
    <Layout>
      {" "}
      <Box borderColor="black">
        <Box mt="10" fontSize={24} fontWeight="semibold" as="h1">
          Latests Posts
        </Box>
        <Divider />
        {blogs.length === 0 && (
          <Box mt="10" fontSize={24} fontWeight="semibold" as="h1" textAlign="center">
            No Posts Found
          </Box>
        )}
        {loading ? (
          <Box mt="10" fontSize={24} fontWeight="semibold" as="h1" textAlign="center">
            Loading...
          </Box>
        ) : (
          <SimpleGrid mt="10" columns={2} spacing={10}>
            {blogs?.map((blog, index) => (
              <div key={index}>
                <Card blog={blog} />
              </div>
            ))}
          </SimpleGrid>
        )}
      </Box>
    </Layout>
  );
};

export default Home;
getBlogs returns all the blogs from our contract, this will be displayed on the Home page.
Import the Home page into App.js and add it as a route in the <Routes> component.
import "regenerator-runtime/runtime";
import React from "react";
import { BrowserRouter, Routes, Route } from "react-router-dom";
import Home from "./pages/Home";

export default function App() {
  return (
    <BrowserRouter>
      <Routes>
        <Route path="/" element={<Home />} />
      </Routes>
    </BrowserRouter>
  );
}
Run npm start and navigate to localhost to view dapp.
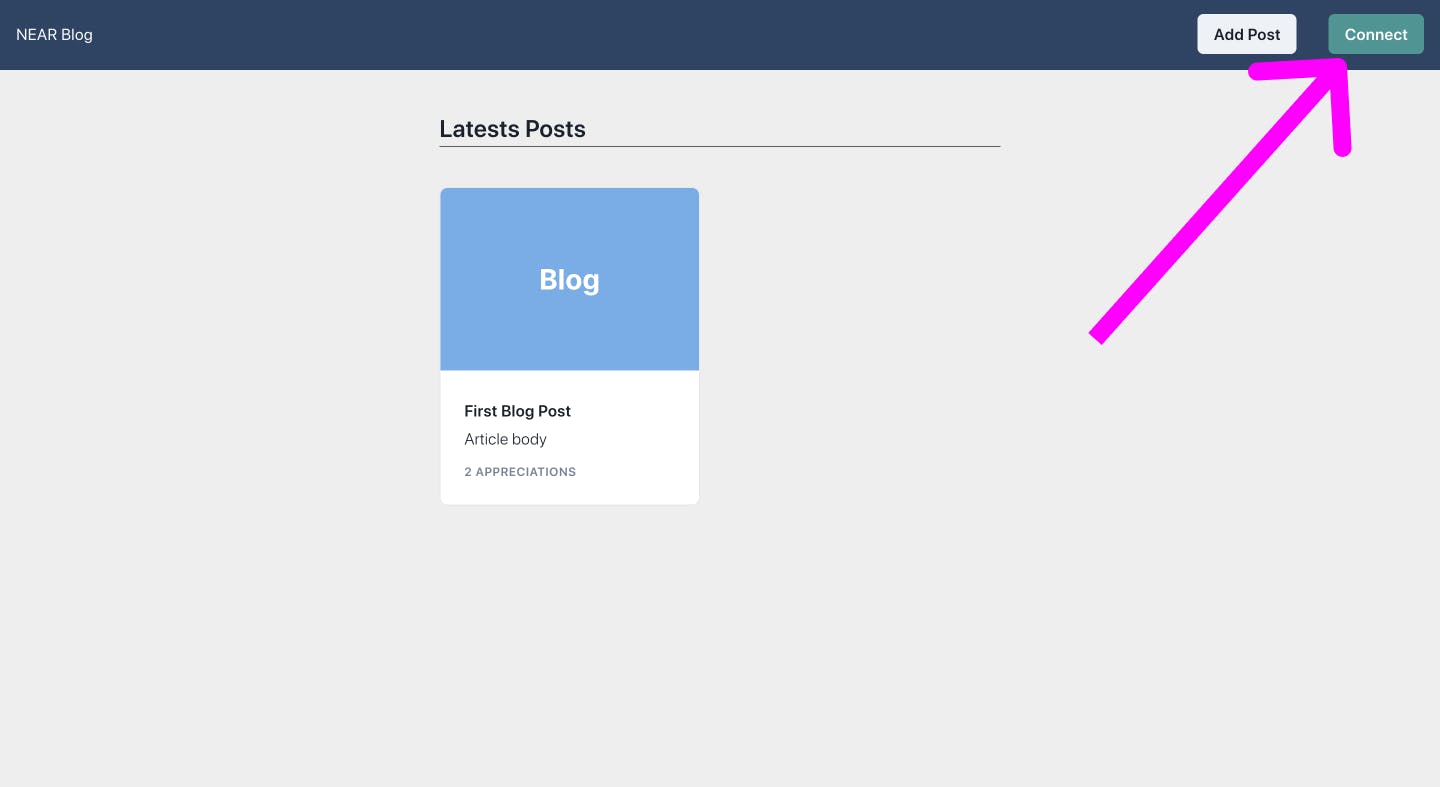
Click the connect button to connect your wallet.
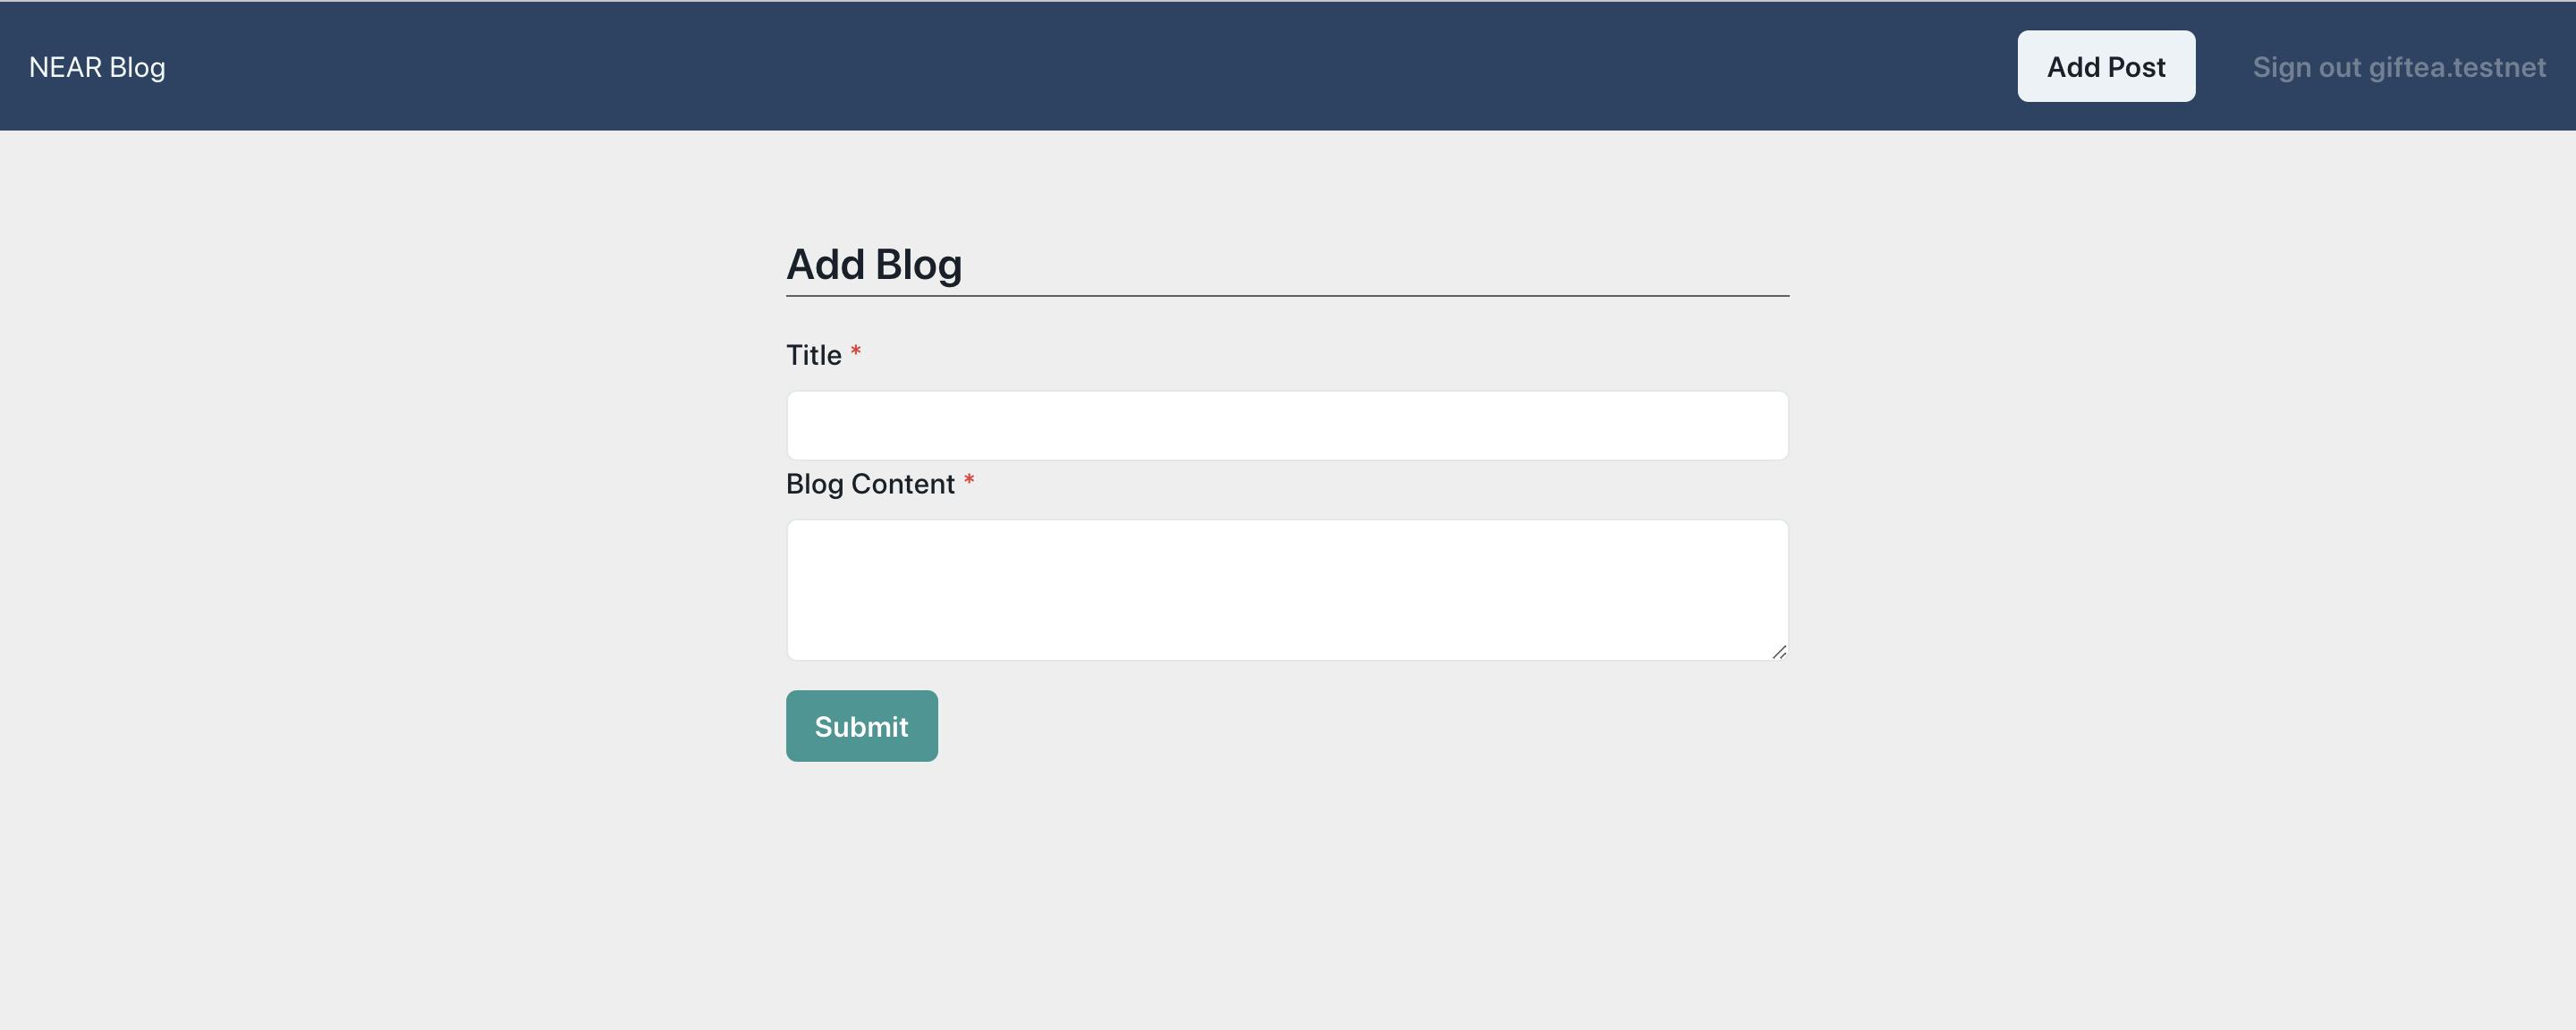
AddBlog Page
The next page to create is the AddBlog page where we can interact with the createBlog() function to create a new blog.
Create a new file pages/AddBlog.js and paste the code below:
import React, { useState } from "react";
import { FormControl, FormLabel, Input, Button, Box, Divider, Textarea } from "@chakra-ui/react";
import { createBlog } from "../near-blog-api";
import { Layout } from "../components/Layout";

const AddBlog = () => {
  const [values, setValues] = useState({
    title: "",
    content: "",
    appreciationCost: '1',
  });

  const onChange = (e) => {
    setValues((prev) => ({
      ...prev,
      [e.target.name]: e.target.value,
    }));
  };

  const onSubmit = async () => {
    createBlog(values);
  };

  return (
    <Layout>
      <Box borderColor="black">
        <Box mt="10" fontSize={24} fontWeight="semibold" as="h1">
          Add Blog
        </Box>
        <Divider />
        <FormControl mt="5" isRequired>
          <FormLabel>Title</FormLabel>
          <Input value={values.title} name="title" required onChange={onChange} bg="white" />
        </FormControl>
        <FormControl isRequired>
          <FormLabel>Blog Content</FormLabel>
          <Textarea value={values.content} name="content" onChange={onChange} bg="white" />
        </FormControl>
        <FormControl mt="5" isRequired>
          <FormLabel>Appreciation Cost</FormLabel>
          <Input name="appreciationCost" value={values.appreciationCost} onChange={onChange} bg="white" />
        </FormControl>
        <Button mt={4} colorScheme="teal" type="submit" onClick={onSubmit}>
          Publish
        </Button>
      </Box>
    </Layout>
  );
};

export default AddBlog;
The createBlog function takes the values of title, content, and appreciationCost to create a new blog.
Import the AddBlog page into App.js and add it as a route in the <Routes> component.
<Routes>
    <Route path="/" element={<Home />} />
    <Route path="/add" element={<AddBlog />} />
</Routes>
Click the Add Post button on the navbar and try creating a new blog post. You will be directed to your NEAR wallet to approve the transaction.
Visit the Home page and check out your new blog post!
Blog Page
The blog page will display details of a single blog.
Create a new file pages/Blog.js and paste the code below:
import React, { useEffect, useState } from "react";
import { useParams } from "react-router-dom";
import { Divider, Box, Button } from "@chakra-ui/react";
import { getBlog, appreciateBlog } from "../near-blog-api";
import { Layout } from "../components/Layout";
import { utils } from 'near-api-js';

const Blog = () => {
  let { id } = useParams();
  const [blog, setBlog] = useState({});
  const [loading, setLoading] = useState(false);

  const fetchBlog = async () => {
    try {
      setLoading(true);
      setBlog(await getBlog({ id: id }));
      setLoading(false);
    } catch (error) {
      console.log({ error });
    } finally {
      setLoading(false);
    }
  };

  useEffect(() => {
    fetchBlog();
  }, []);
  return (
    <Layout>
      {loading ? (
        <Box mt="10" fontSize={24} fontWeight="semibold" as="h1" textAlign="center">
          Loading...
        </Box>
      ) : (
        <Box p="4" boxShadow="xl" rounded="md" bg="white" marginTop="10" py="5">
          <Box borderColor="black">
            <h1 style={{ fontSize: "20px", fontWeight: "bold" }}>{blog?.title}</h1>
            <Box color="gray.500" fontWeight="semibold" letterSpacing="wide" fontSize="xs" textTransform="uppercase" mt={3}>
              Written By {blog?.author}
            </Box>
            <Divider />
          </Box>

          <Box paddingTop="2rem">{blog?.content}</Box>
          <Box color="gray" my="3">
            <p>{blog?.appreciationCount} Appreciations</p>
          </Box>
          <Button onClick={() => appreciateBlog(id, blog?.appreciationCost)}>
            Appreciate with {utils.format.formatNearAmount(blog?.appreciationCost)} NEAR
          </Button>
        </Box>
      )}
    </Layout>
  );
};

export default Blog;
The getBlog function takes in an object of a blog's id and retrieves the stored details from the blockchain.
The 'Appreciate' button calls the appreciateBlog function and directs you to your NEAR wallet to approve a transfer of the appreciationCost to the blog author.
Import the Blog page into App.js and add it as a route in the <Routes> component.
<Routes>
    <Route path="/" element={<Home />} />
    <Route path="/add" element={<AddBlog />} />
    <Route path="/blog/:id" element={<Blog />} />
</Routes>
On the home page, click on a blog card to view the blog on the blog page.
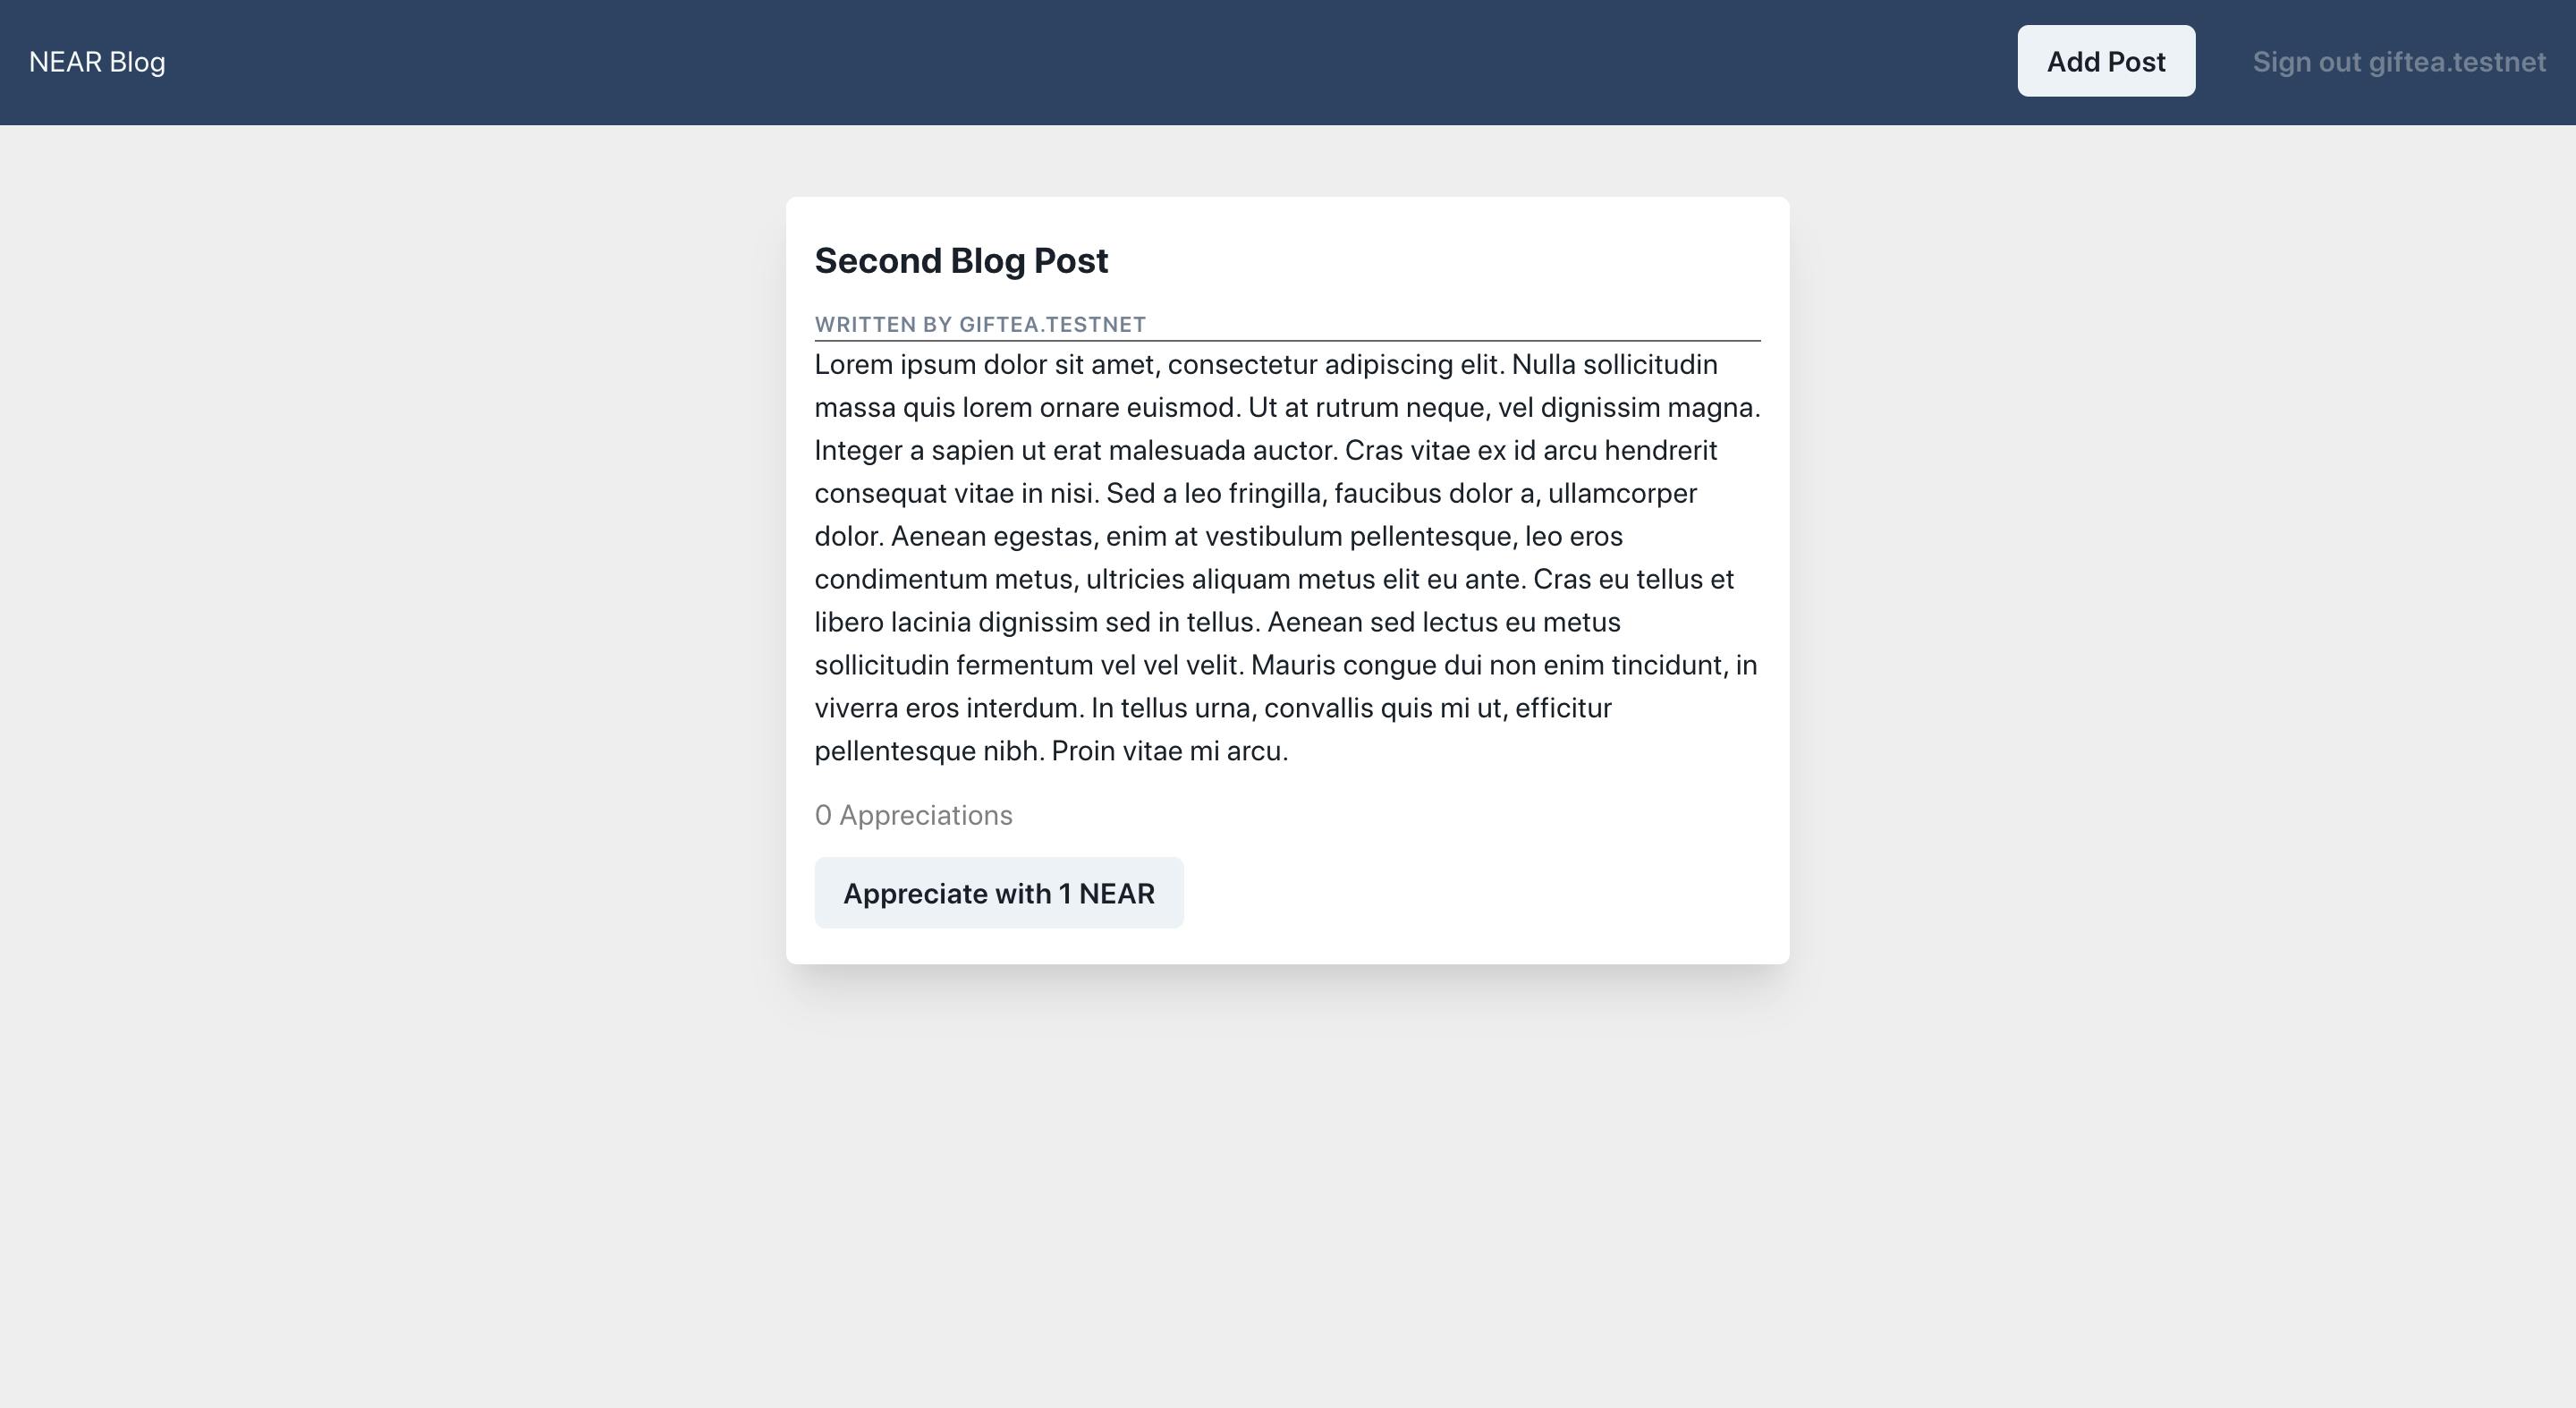
Interact with the blockchain by appreciating a blog post!
Follow the instructions below to deploy your application to Vercel:

Visit source code and live link.
Conclusion
Developing smart contracts on the NEAR protocol is very easy to get started with using AssemblyScript. To build NEAR smart contracts with Rust, you have to learn the Rust language.
Looking for resources to learn Rust? I've curated a list.
Visit Near Academy to learn how to build dapps on NEAR.