


Creating a chat application from scratch is expensive, time-consuming and not beginner friendly, for a beginner in frontend development whose aim is to create an impressive portfolio project, creating a chat application from scratch may not be the best idea because good knowledge of backend tools like Nodejs and socket.io would be needed.
In this article I'd lay out easy peasy steps on how to make a very simple chat board with just a few lines of code with the help of Chat Engine.
Prerequisite
What is Chat Engine ?
Chat Engine is an API which makes it easy to build chat services. They provide a Rest API to host your chats, and NPM components to help with your Chat UI. Their servers can host all your chat needs.
With basic frontend skills like: HTML, CSS, Javascript and Reactjs you can build your next portfolio project!
Let's Get Started
Creating our Application
Head to your terminal and create a new react app by running
npm i create-react-app project-nameoryarn create react-app my-app. Once your app is created, you can start your application by runningnpm startoryarn start.Install the chat engine in your app by running
npm i react-chat-engineoryarn add react-chat-engine.Visit and register an account at chatengine.io. After creating your account, create a new project by clicking 'New Project' and save your
projectID. Under your new project, create a new user and save the user secret too.
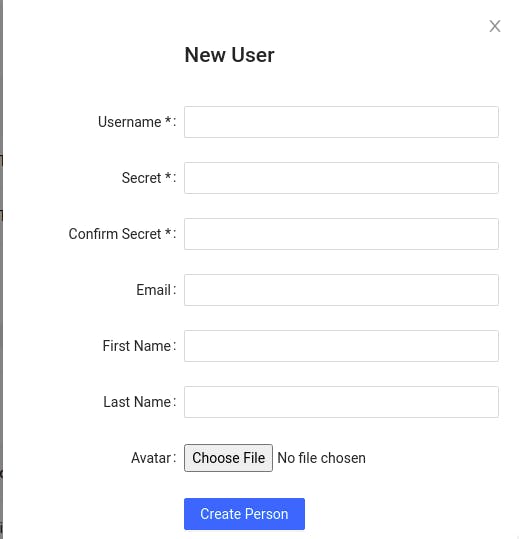
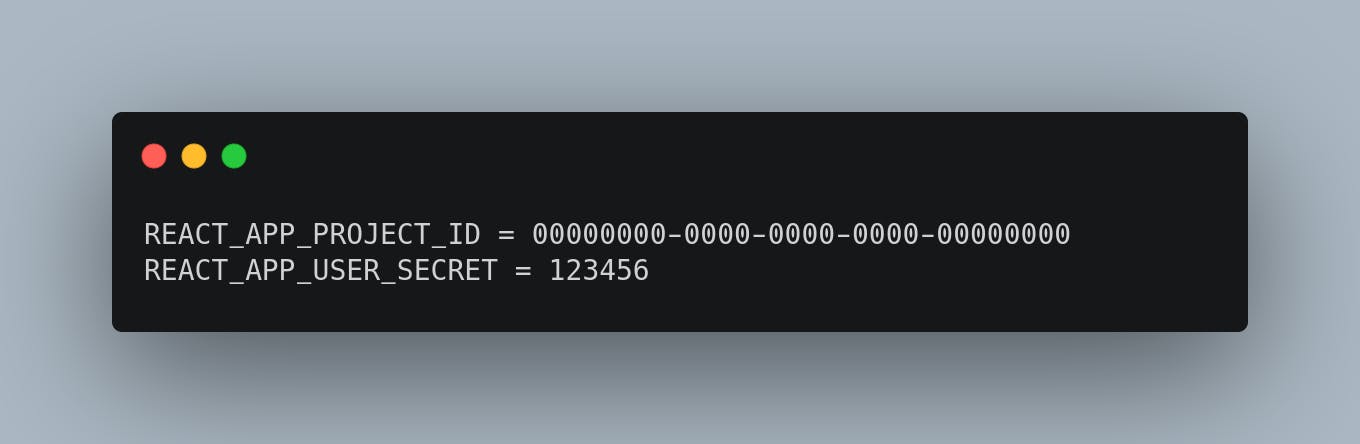
- Now you have your
projectIDanduserSecret, create a.envfile in your folder and store them as environment variables.
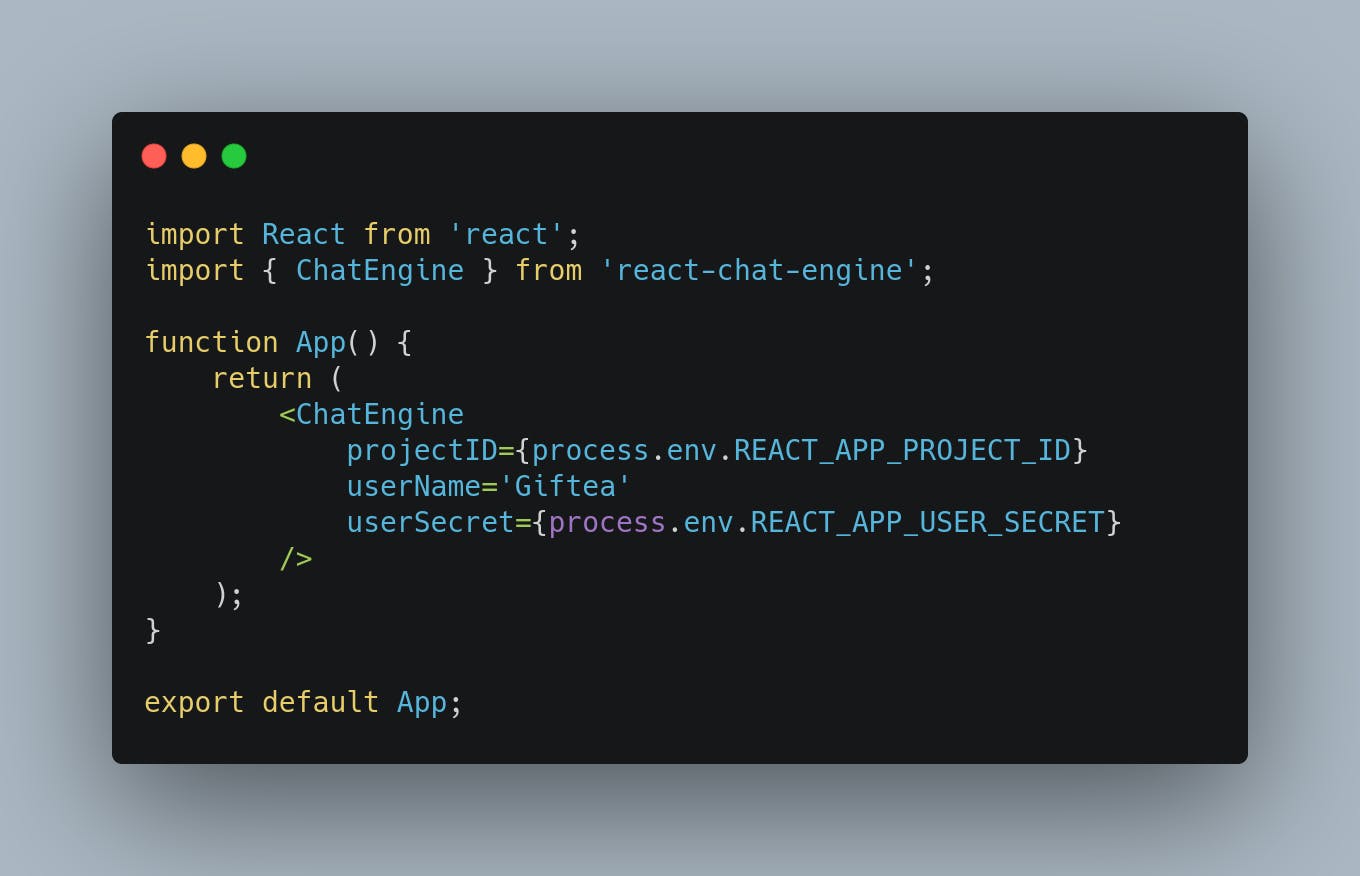
Import the ChatEngine component in your app and just like every other react component, you can pass different props into it e.g width or height, but the most important props to add to your component to connect your react app with the chat engine project you created earlier is by passing the following props:
projectID(the project ID you saved as an environment variable).userName(the username of the user you created in your project at chatengine.io).userSecret(the user secret you saved as an environment variable).
- Start your application by running
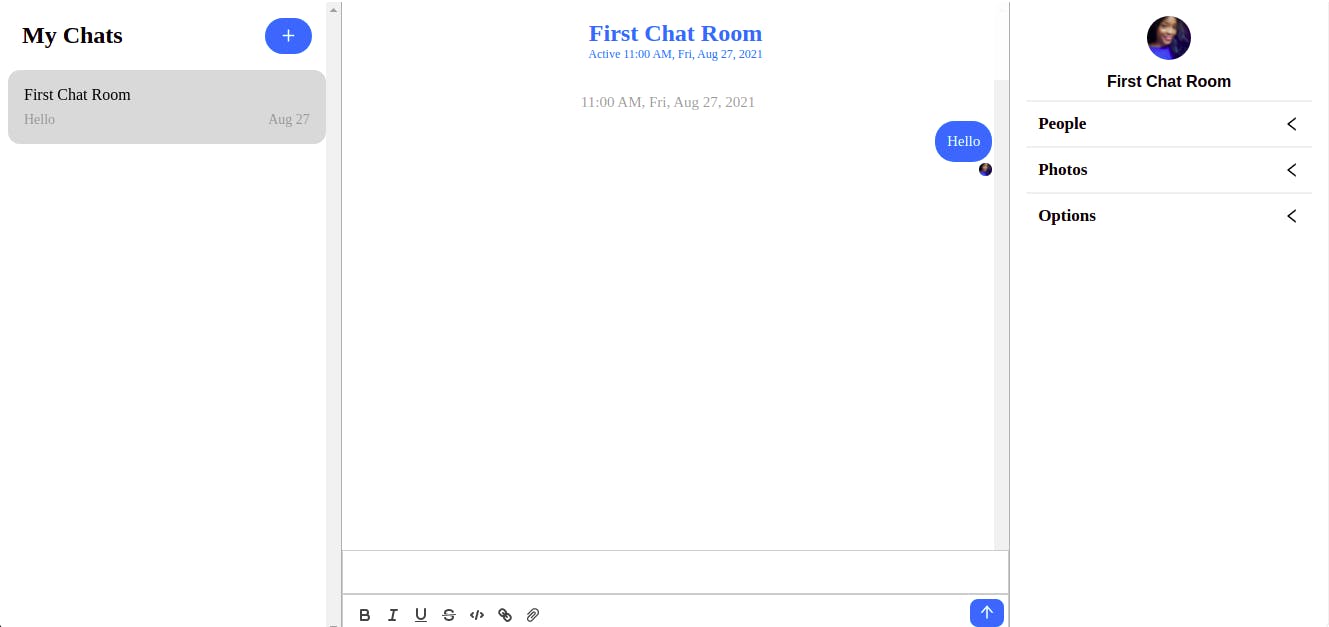
npm startoryarn startif you didn't do that earlier. You should be welcomed with a chat room interface, navigate to the top left corner and add a new chat.
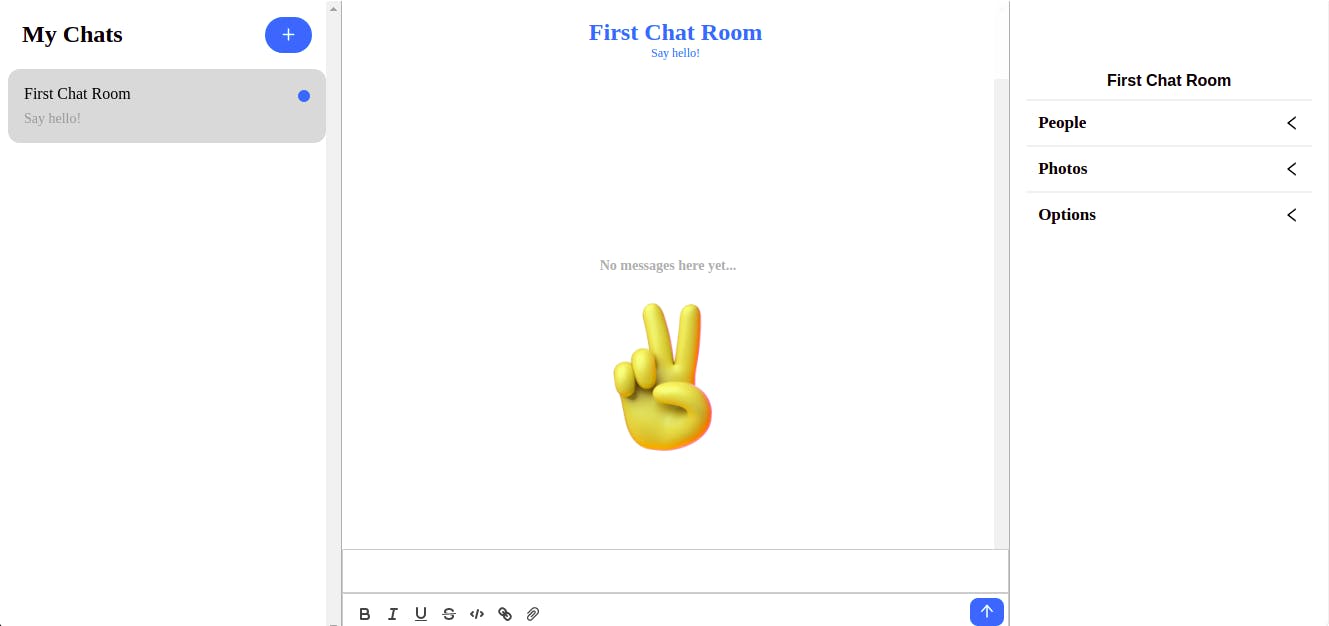
Congratulations, you've created your first serverless chat application!
You can send a message to the chat room.
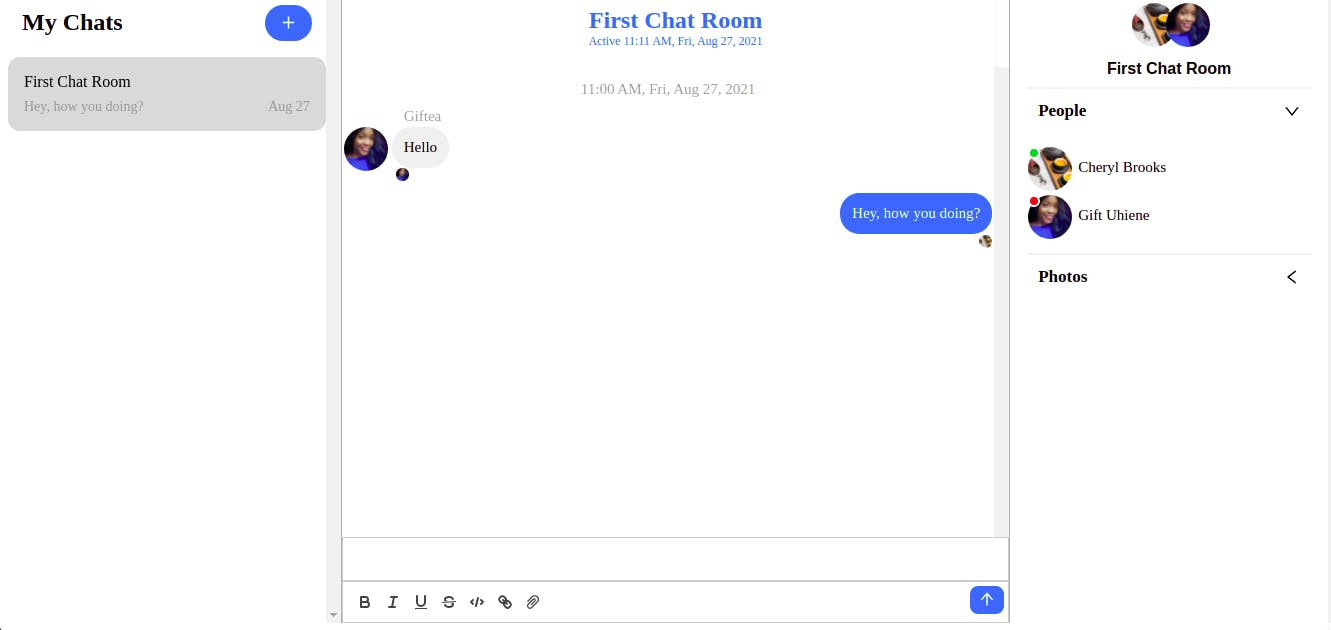
Add a second user to your project the same way you added the first user.
Back in your chat application, at the top right corner, there's a dropdown for 'People', click on it, search for your new user and add your new user to the chat.
Head back to your IDE, in your
App.jsfile, replace theuserNameanduserSecretof your first user to that of your second user. Refresh your browser and you should be logged in as your second user. Now both users can chat on the application.
Conclusion
Of course this is just the tip of the iceberg, by studying their Documentation you can go all out and create a very impressive chat application with just a few lines of code. You can implement Direct Messaging, Community Chat Board and other cool features.